Blender at school
Blender - What's different at school?
Blender at school is mostly stock Blender, with a few additions that are all set up for you automatically. You don't have to enable anything in your preferences.
Blender is globally installed; but some people have their own versions installed. Be aware: only the official supported version will run on our farm; use other versions at your own discretion
Color management
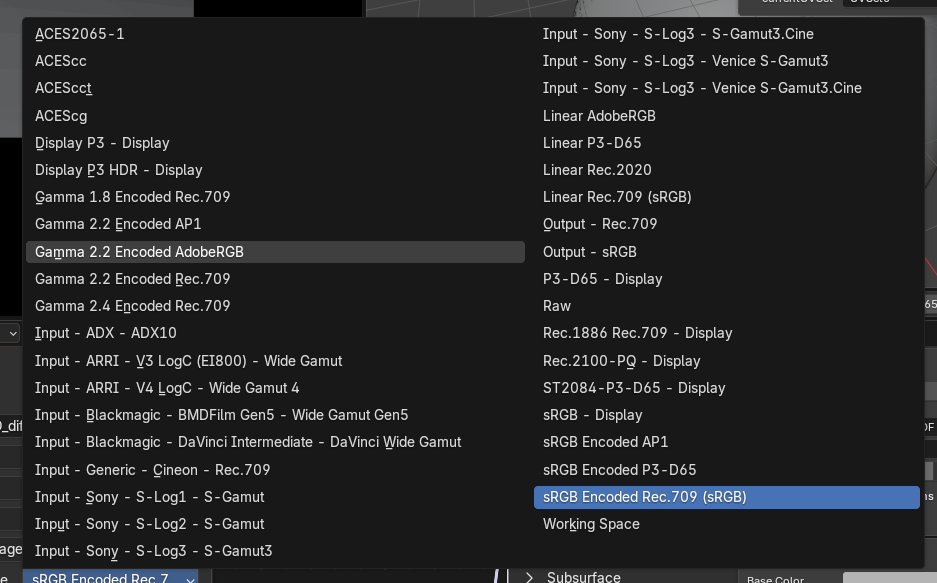
Color management is globally configured for all our applications at school, Blender included: we use an ACES 2.0 config, and Blender renders in ACEScg. Blender is a bit weird about it though: when you pick a colorspace for a texture, it shows the entire list without any categories.
Using BlenderKit? Its thumbnails are corrected automatically, so they show in the right colors.
Extra add-ons
These add-ons are always enabled:
- Submit To Deadline: rendering on our farm, see Blender - Rendering on the farm.
- Camera Shakify: adds real captured camera shake to your camera. You'll find it in the Camera properties.
- KeenTools: FaceBuilder, FaceTracker and GeoTracker. These use our license server, see Software licenses.
Default preferences
The first time you open a Blender version, a few preferences are set for you:
- Cycles renders on the GPU (OptiX) and the CPU together
- Vulkan as the display backend
- 256 undo steps
- Node Wrangler enabled
This only happens once per Blender version. If you change any of these settings yourself, they stay the way you set them.
Blender - Rendering on the farm
Blender is supported on our Deadline render farm. The farm renders only our officially supported version
Before you submit
- Save your .blend file on our storage server. A file that isn't saved, or is saved on a local drive, can't be submitted.
- All files your scene uses (textures, HDRIs, linked libraries, caches, ...) have to be on the storage server too. Textures and sounds can also be packed into your .blend with File > External Data > Pack Resources. Linked libraries, movie clips and VDB volumes can't be packed.
- Set the output path in Output Properties to a folder on the storage server. Local drives (like C:\) don't work on the farm.
Submitting
Click Render > Submit To Deadline in the top menu bar.

Do some files in your scene point to a local path? Then you first get a list of them. Press OK to submit anyway, or close the window and fix them first.
After a few seconds the Deadline submission window opens. Most fields are already filled in for you:
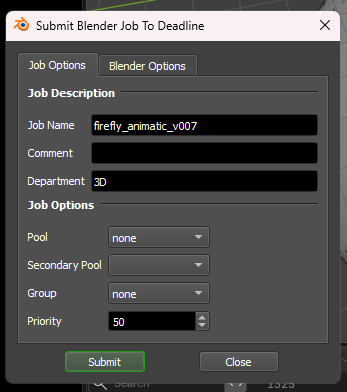
Job Options tab:
- Job Name: the name of your job in the Deadline Monitor. Filled in with your file name.
- Comment: shown in the Comment column of the Monitor. Optional.
- Pool / Group: leave these on none unless you've agreed otherwise with your render managers.
- Priority: jobs with a higher priority are picked up first when a PC is free. Don't change it unless you've agreed on a different number with your render managers.
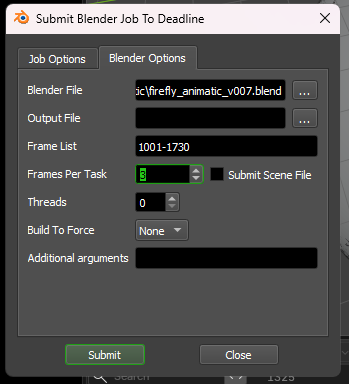
Blender Options tab:
- Output File: leave this empty to use the output path from your .blend file.
- Frame List: the frames to render, filled in from your scene. For example 1-250, or 1,10,20 for a few test frames.
- Frames Per Task: how many frames one PC renders before it picks up the next task. 1 is fine for most renders.
- Leave the other options as they are.
Press Submit, and your job shows up in the Deadline Monitor. If something goes wrong during the render, check the job comment first; our event plugins explain there what happened.