Houdini in our ShotGrid pipeline
- Houdini - ShotGrid - Loading publishes
- Houdini - ShotGrid- Uploading flipbooks for review
- Houdini - ShotGrid - Shading workflow
- Houdini - ShotGrid - Rendering with Karma
- Houdini - ShotGrid - Exporting USDs
- Houdini - ShotGrid - Publishing
- Houdini - ShotGrid - Other pipeline tools
Houdini - ShotGrid - Loading publishes
You can load in files other people have published by going to the "ShotGrid" -> "Load..."
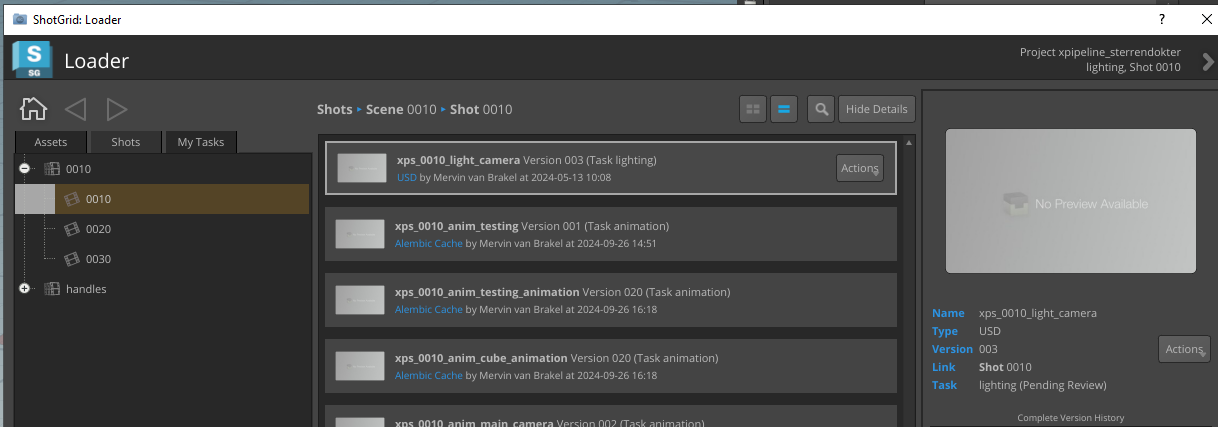
A lot of file types can be loaded into Houdini, but here's a short list of the main loading operations you'll be using:
- USD files can be loaded into your stage through a Reference or a Sublayer node. References should be used when the loaded USD needs a new place in your hierarchy, e.g. for assets. Sublayering should be used when the loaded USD is meant as a separate layer in your hierarchy, e.g. our Maya animation publishes, which always go to the Animation layer.
- Alembic files can be loaded into your Houdini file as an Alembic node in SOPs, inside a SOP Create in your stage and hooked up to a component builder in your stage (for use in our asset shading workflow).
- Published textures can be loaded as MaterialX nodes, which can be automatically turned into a Karma material. Check out this page for more information on our shading workflow.
Loading tools largely unchanged from ShotGrid base implementation.
Houdini - ShotGrid- Uploading flipbooks for review
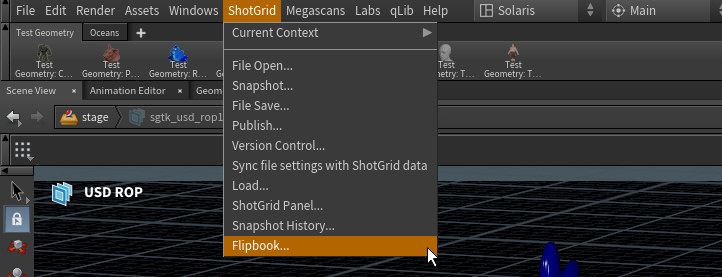
This tool allows you to easily make a render of your viewport and upload it to the ShotGrid website for review. If you click it this menu opens:
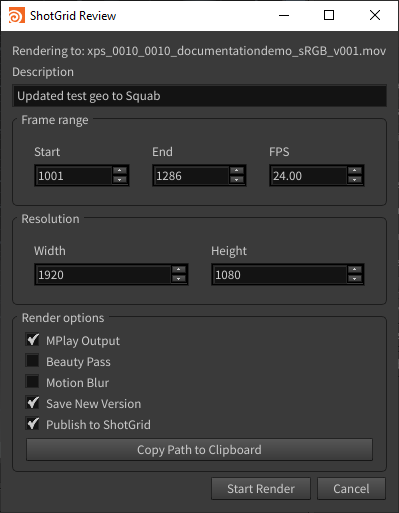
Most settings speak for themselves. Make sure you're looking through the right camera in your viewport (if you're using one) and click Start Render. This will capture the viewport, transcode it to a video and upload it to the ShotGrid website.
Original flipbook tool by Gilles Vink, replaced with new multi review tool by Max de Groot.
Houdini - ShotGrid - Shading workflow
We have some automated tools which make shading assets a lot simpler. Here's what you need before shading your asset:
- A model published in Maya using the Alembic publisher.
- Textures for that model published in Substance or Mari using the ShotGrid publisher.
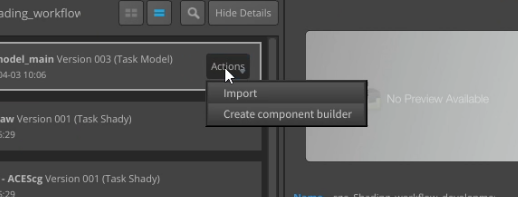
Open Houdini and create a file through the ShotGrid menu. Open the loader and load in your model using the "component builder" loader. This will place a component builder template into your scene.
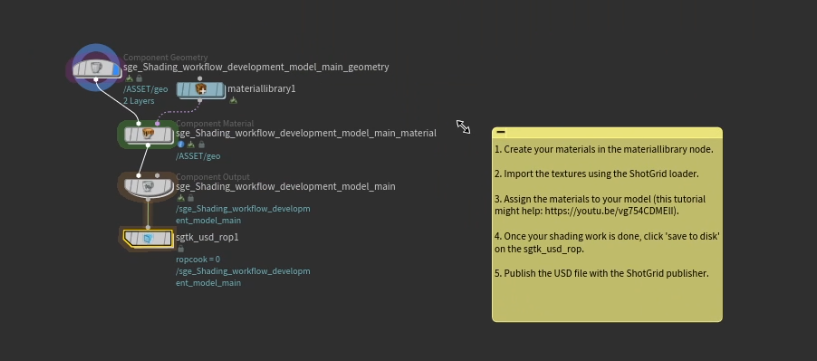
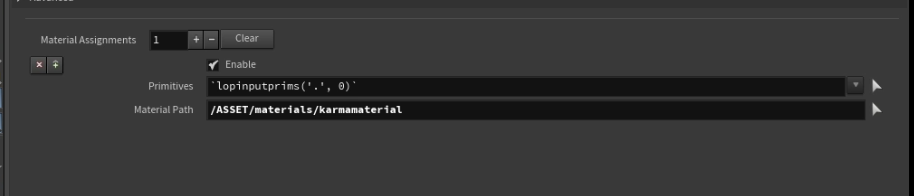
Your model is placed in the Component Geometry node automatically. You should now create a Karma material inside the Material Library node and give it a good name. Go over to the "Component Material" node and make sure your Material path is set up correctly:
After this you can open the loader again and browse to your published textures. When you load them in a new menu appears:
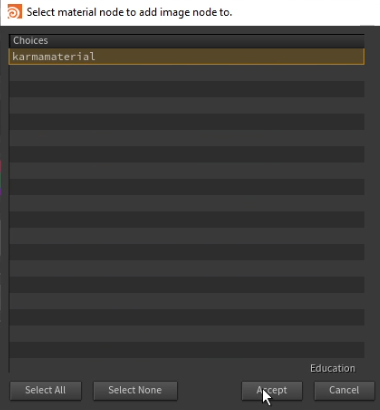
Select the correct material and press accept. A new pop-up now appears asking if you want the textures to be automatically added to the correct inputs. Click yes if you want this.
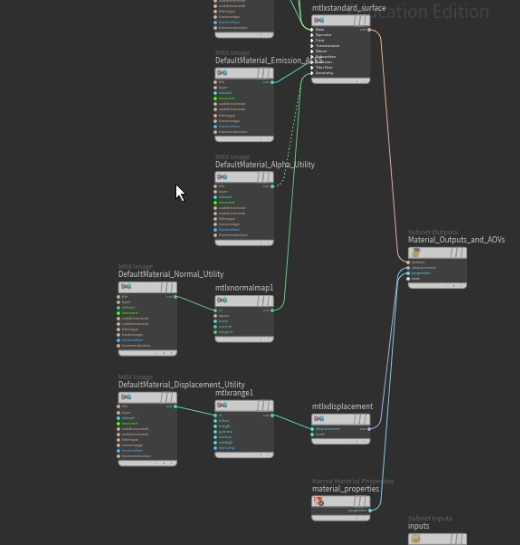
After this you'll have a good base material setup to start with! Continue your shading as usual until it's all done, then it's time to publish.
You can save your asset by clicking on the "Save to Disk" button that's in the SGTK USD node at the bottom of the component builder setup. Now you can click on "Publish..." in the ShotGrid menu, here your file will show up. Press publish to publish your now shaded asset.
Shading tools by Mervin van Brakel.
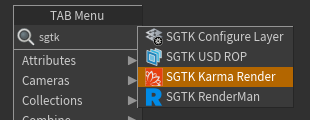
Houdini - ShotGrid - Rendering with Karma
We mostly render using Karma in our ShotGrid pipeline. It's fast, reliable, and SideFX actually responds to our emails if we need help! To get started, add a SGTK Karma Render node at the bottom of your node tree.

We used to have Arnold and RenderMan integrations as well, but they haven't been updated and are thus currently not usable. A student will have to put in some work to get these integrations up and running again.
Starting your first render
If you click on the sgtk_karma node you'll see this interface:
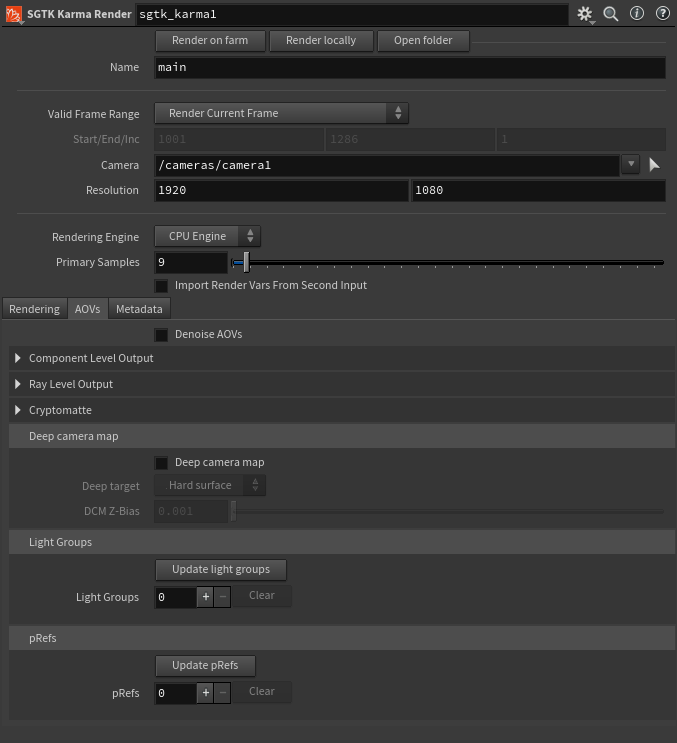
It's similar to the Karma Render Settings node, except it's a bit easier to use and comes with some additional features. Added features include easy farm submissions tools, automatic file paths, easy light groups configuration and easy deep configuration. To get started, simply select the right camera and press "render on farm". A new pop up appears:
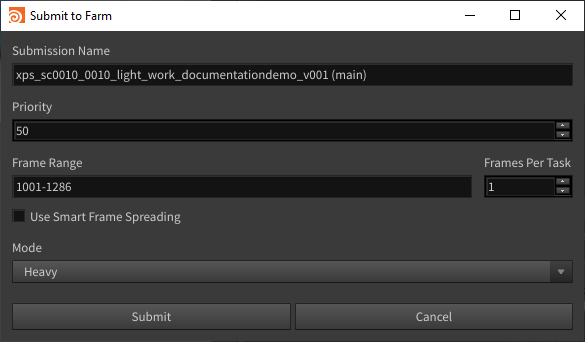
The default value is fine for pretty much all of these. If your render is very lightweight you might want to change the mode to medium or light. You can enable the Use Smart Frame Spreading option if your render is sure to take a long time, as this ensures the first, last and middle frames are rendered first so you can quickly see if there are any problems in your render.
Cryptomattes are enabled by default and will be rendered to separate EXR files, this is because Nuke seems to have some problems reading multi-layer EXRs with a Karma rendered Cryptomattes in them.
Most options such as sample settings, AOVs, etc remain unchanged. There are a couple of extra options you should know about though:
Denoising
There's a tiny checkbox in the AOVs panel that says Denoise AOVs:

If you enable this, a special post-job script runs on the farm whenever a frame finishes rendering. This script denoises the frame and places it in a separate folder, which shows up just like your other renders in the publish menu. Your original frames are never modified.
The Denoise AOVs checkbox only applies to farm renders. It will not work on local renders.
Light groups
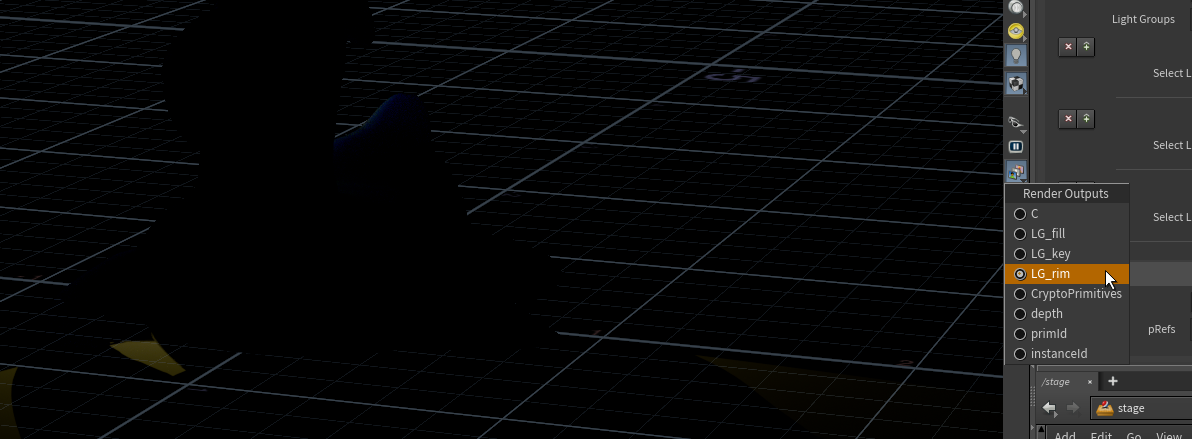
Light groups allow you to render specific lights separately so you can later manipulate them in comp. You can add a light group by clicking the + in the light group tabs. Fill in the name of your light group and press the icon in the Select Light LOPs section.

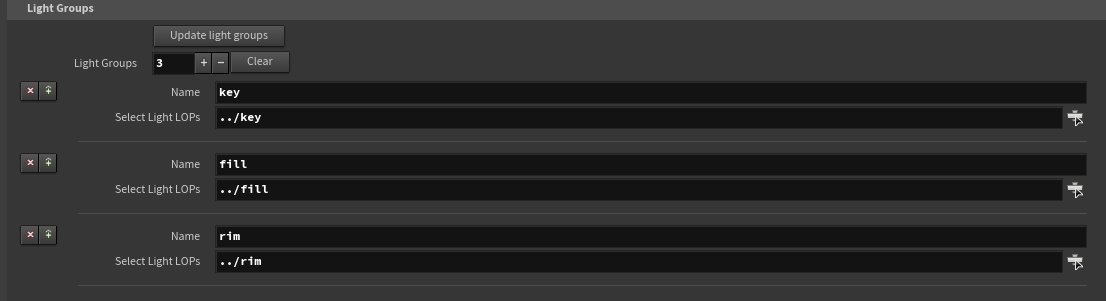
Press Update light groups when you're done settings things up. This will cause the AOVs to be added to your render, double check they are working in the viewport by selecting them as Render Outputs.
In Nuke you can now add the LightGroupMixer node to grade your light groups.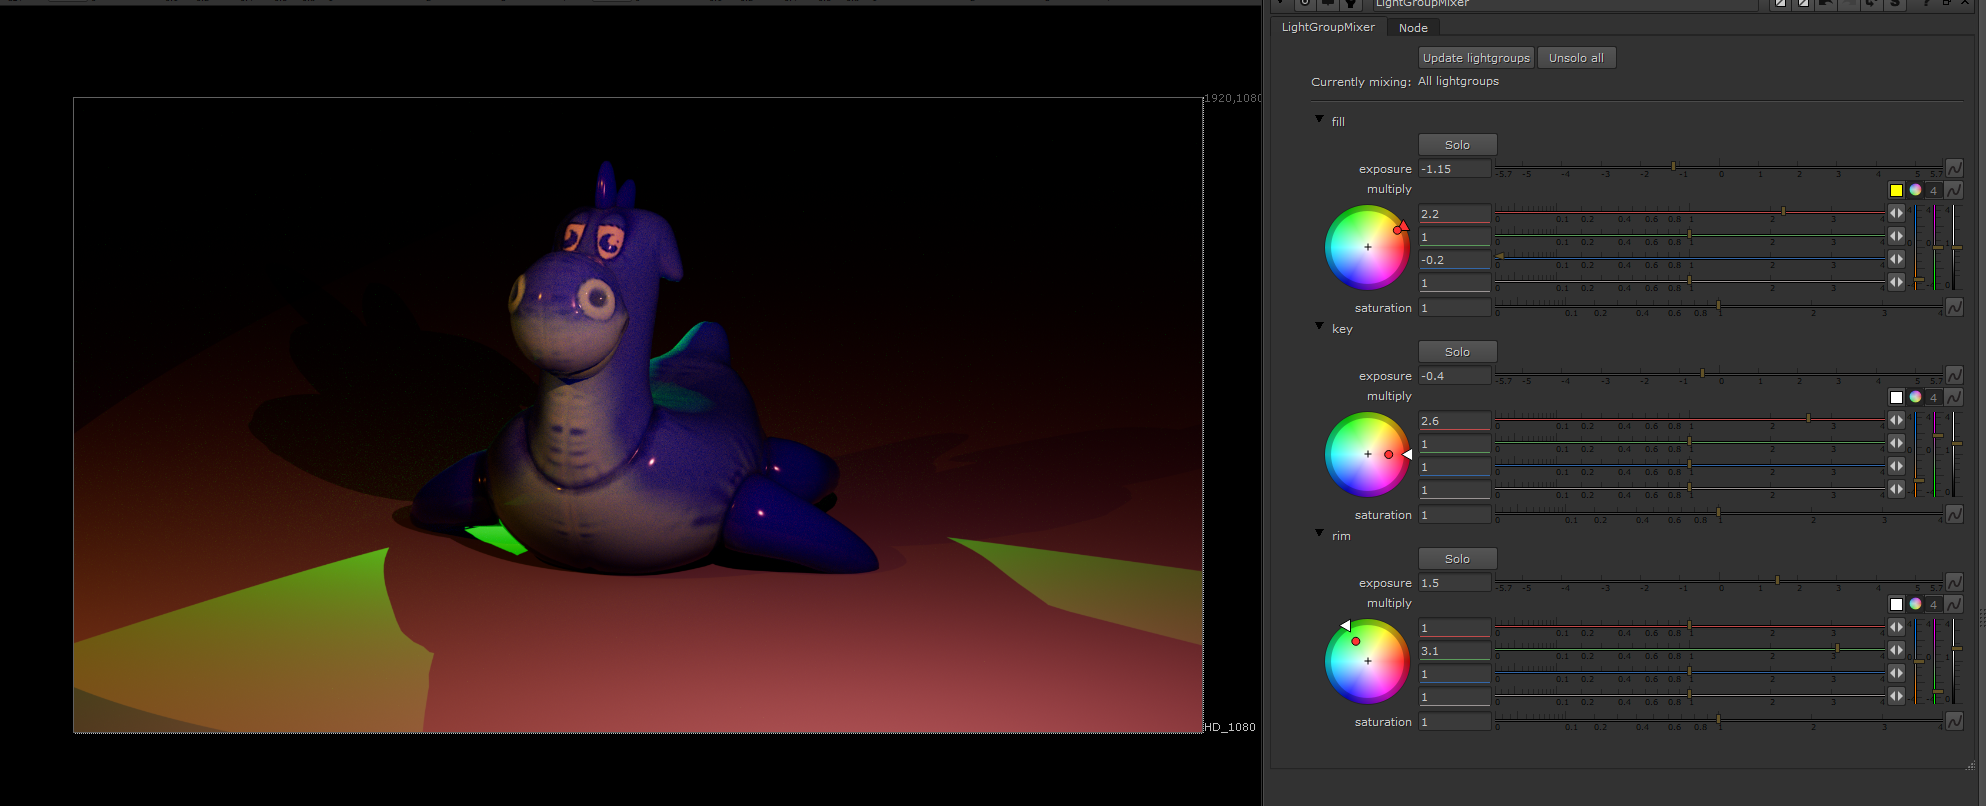
Adding custom AOVs
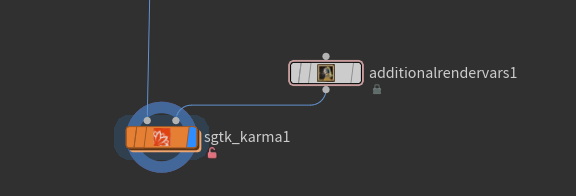
Sometimes you'll need to add some custom AOVs to your render. Normally you might do this in the Karma Render Settings node in the Extra Render Vars section, but this section is not available in the SGTK Karma node. So instead you should create an Additional Render Variables node and plug it into the second input of the SGTK Karma node. Then enable the Import Render Vars From Second Input option in the SGTK Karma node.
Arnold integration developed by Bo Kamphues, original RenderMan integration by Gilles Vink and later rewritten by Max de Groot, Karma integration developed by Mervin van Brakel.
Houdini - ShotGrid - Exporting USDs
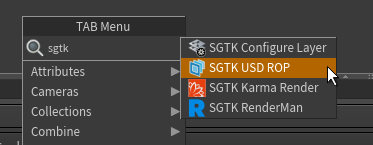
We don't have a great USD pipeline at school, but we do have a couple integrations that are useful when working with Solaris. One of these tools is the SGTK USD ROP. You can find it in the TAB menu when you're working on your Stage.
The node has a couple settings and a Save to Disk button:
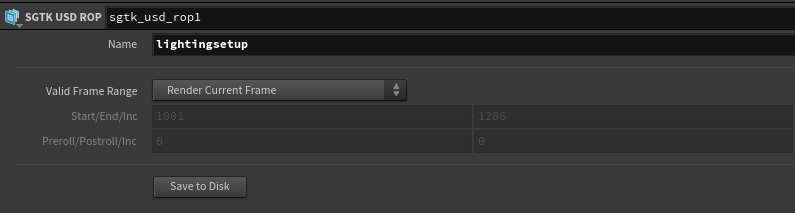
It's essentially just an easy way of sharing the USD you've built with Solaris, as it wraps the regular USD ROP, taking care of file paths automatically. It's a decent all-round tool for publishing layouts, assets, etc. It's just not very configurable.
Once you've saved your files to disk you can publish them like normal in the Publish menu.
USD export tools by Gilles Vink.
Houdini - ShotGrid - Publishing
Once you've rendered some frames using the Karma node it's time to publish them. You can also publish other files you've made using SGTK nodes, such as USD, FBX or Alembic files. You can publish these files by going to ShotGrid -> Publish...
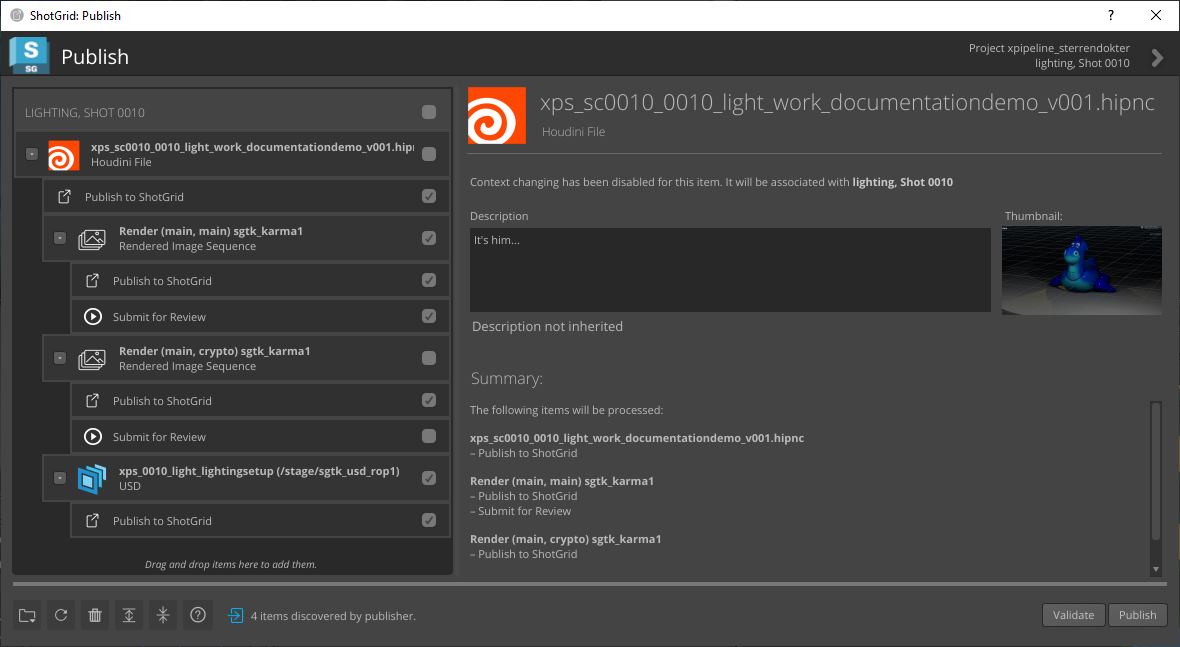
Here all your renders and other files show up. Notice how only your main render has the Submit for Review checkbox checked, this happens automatically because often you don't want to render a review version of stuff like cryptomattes. The Submit for Review option will start a process on our render farm, where the frames will be turned into a .MOV and uploaded to the ShotGrid website automatically. Press Publish to publish your files.
Deadline review submission logic by Gilles Vink.
Houdini - ShotGrid - Other pipeline tools
Houdini in our ShotGrid pipeline has two other nice features that you should be aware of.
Task templates
It's possible to create a Houdini file that will be loaded by default when an artist creates a new file in a given pipeline step. E.g. a clothing FX template gets automatically loaded in when you create your first file on a clothing FX task. Setting this up is easy, browse to your ShotGrid project on the Storage server and go to 00_pipeline -> houdini -> templates. Here you can add .hipnc files, they should have the same name as the pipeline step for which they should be automatically loaded, like this:
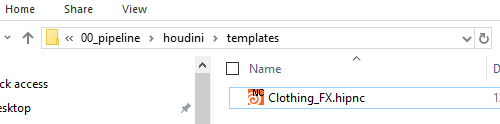
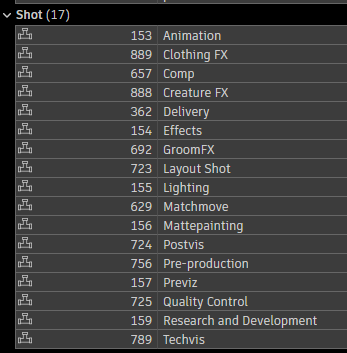
Pipeline step names can be found on the ShotGrid site. Be sure to replace a space with an underscore in the .hipnc file.
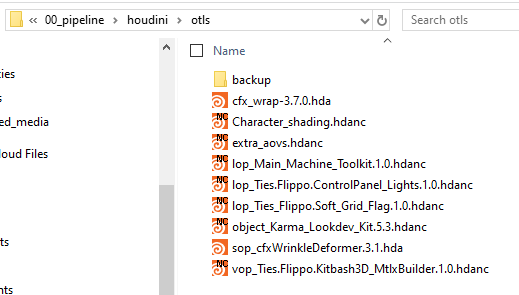
Project-specific HDAs
It's nice to have some custom HDAs that are automatically loaded for the project you're working on. To add an HDA to a project, browse to your ShotGrid project on the Storage server and go to 00_pipeline -> houdini -> otls. Here you can add your .hda files, like this:
OTL (Operator Type Library) is Houdini's technical term for its internal representation of a digital asset.