Using ShotGrid production tracking
Guides on using the more production-oriented ShotGrid tools.
ShotGrid - Creating a project
The first step in any project that uses our ShotGrid pipeline is to create one using our project creator software. The project creator makes it easy to set up a project and makes sure your project gets created using the correct settings. You can open it up by going to the Windows start menu and searching for NFA ShotGrid Project Creator.
You have to use the project creator software. Do not create a project using the ShotGrid website.

Your ShotGrid account used during creation is automatically fetched from your school PC username, so make sure you run the application on your own computer. The software looks like this:

It pretty much speaks for itself, fill in all the fields, make sure all the validation is green, and click Create project!
Original command-line project creation tool by Gilles Vink, rewritten into a standalone GUI application by Mervin van Brakel.
ShotGrid - Creating a playlist
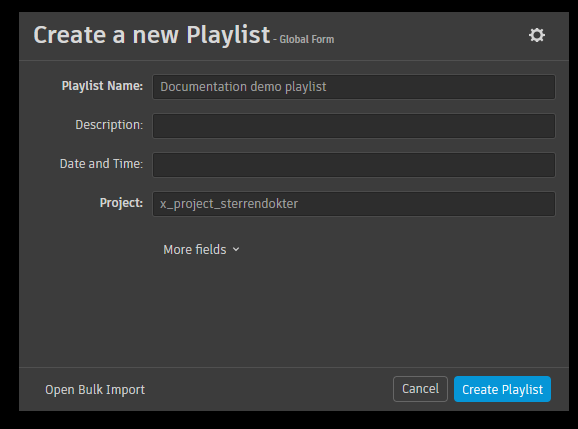
Playlists are a handy way of grouping together versions (the preview videos in ShotGrid) so you can easily review them. To get started, go over to the Review tab on your ShotGrid project page.

There you can create a playlist by clicking on the Add Playlist button. Fill in a descriptive name and click on Create Playlist.
To add a version to your playlist you should play the Link Versions button.
The Add Version button is used to create a new version, not to add an existing version to the playlist. The name is very confusing.

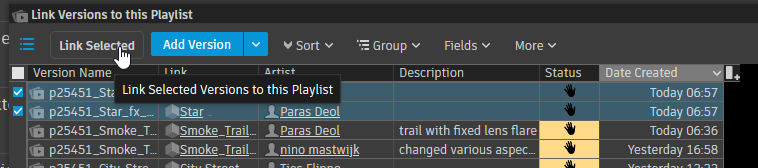
This is where you actually need to select the versions that you want to add to the playlist. It might be useful to click on the Date Created column so newer versions show up first. Select the version you want to add and click on Link Selected. This will add the versions to the playlist.