Maya - ShotGrid - Publishing
Our Maya publisher has quite a few options available. Let's go through them so you know what to publish! To start, open the publisher interface by clicking on ShotGrid -> Publish...
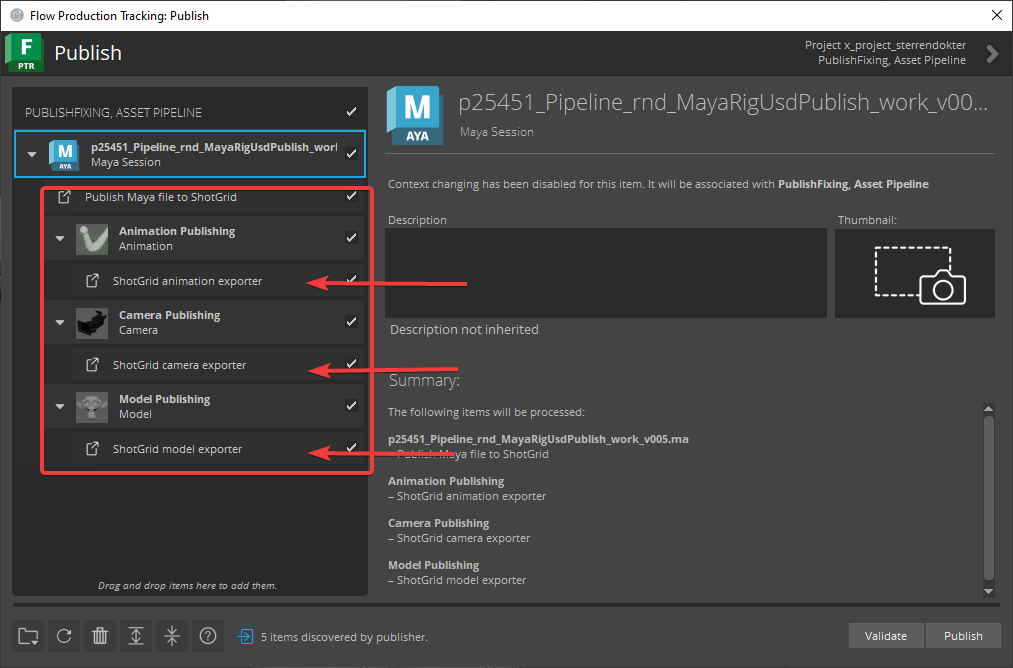
You'll notice there are a couple of options available that you won't find in other software:
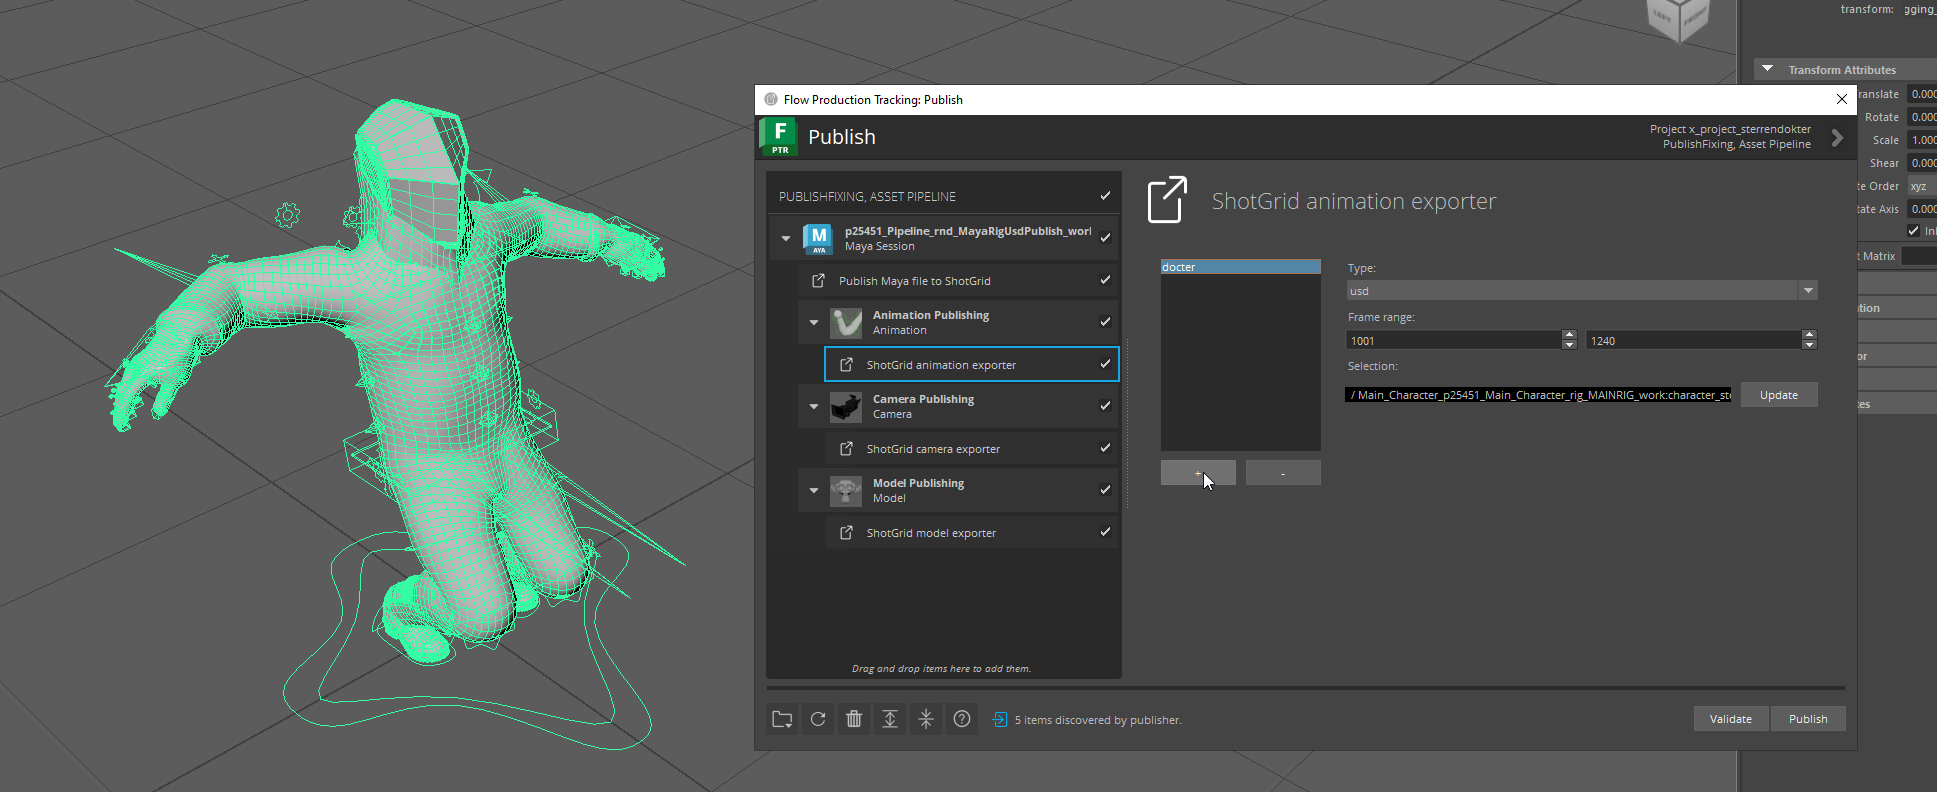
There are three different publishers you can configure: Animation publishing, camera publishing and model publishing. You can tweak their settings by clicking on the exporter tab, which you can see pointed out by the arrows in the screenshot above. This will show the following menu on the right side of the screen (you might have to resize your window a bit to see everything):
Different publishers have different file types available and publish your Maya geometry in different ways. They all generally work the same way. First you should select what you want to export in your scene, then you can press the + button to add a publish for your selection. Your publish will show up in the list:
You can select your publish in the list to tweak its settings, like the publish file type. You can change your selection by selecting something else in the viewport (or outliner) and pressing the Update button. You can add as many publishes as you want. The options are automatically saved in your Maya file so you only have to set your publishes up once! Here's some more information about the specific publishers and their options.
Animation publishing
By default the animation publishers write out your animated geometry to a .USD file for sublayering in Houdini. Animated geometry will be in the Animation layer. Alternatively an Alembic publisher is also available.
The USD animation publisher automatically hides the rig controllers so they don't show up in your render. The Alembic publisher does not have this feature, so you should make a selection that doesn't include the rig if you want to publish clean Alembic files.
Camera publishing
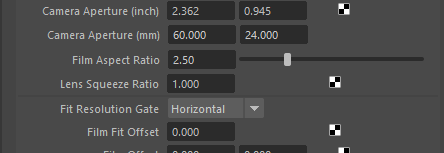
By default the camera publisher writes out your camera to a .USD file for sublayering in Houdini. Your camera will be in the Cameras layer. Make sure your Maya camera Fit Resolution Gate setting is set to Horizontal and your camera's horizontal aperture is set to 60mm, otherwise the cameras won't match up!
Alternatively an Alembic publisher is available, but try to use the USD one if you can.
Model publishing
By default the model publisher writes out your selected geometry as an Alembic file for use in the rest of our shading workflow. You can also publish as an .FBX file, but that's only recommended for use in Unreal.
Once you're done with your export settings you can press Publish!
Original Alembic and USD publishers by Bo Kamphues and Gilles Vink, publishers fully rewritten and expanded by Mervin van Brakel.


