
Nuke - ShotGrid - Rendering
Rendering when working in our ShotGrid pipeline is slightly different but way easier! When you press "W" a new menu pops up (you can also find it in the side bar):
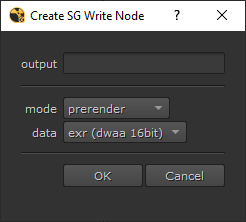
- The output field is where you can enter a descriptive name for your render. For example "despilled", "firerender", etc.
- There are three modes available: main, prerender and mattepainting. The prerender mode should be used for rendering frames which will be used in Nuke; it renders in ACEScg with a light compression. The mattepainting mode should be used for mattepainting purposes for use in e.g. Photoshop, as it renders a 16-bit TIFF in the ADX10 colorspace. The main mode should be used as the last node in your comp, as there can only be one write node using that mode. It renders out EXRs in ACES2065-1, this is because these renders will eventually make their way back to our editors. The render from your main node will be automatically uploaded to the ShotGrid website when you publish it.
- The data dropdown can be used to change some compression settings.
The sgWrite node will be added to your comp when you press OK. When you click on the node you'll see the following options:
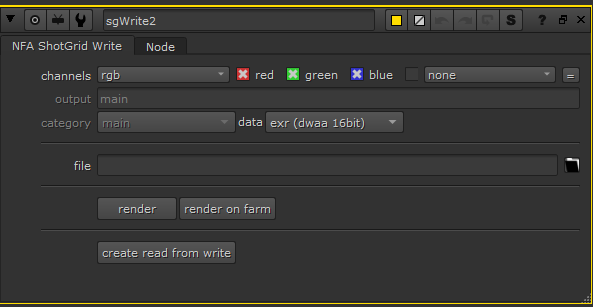
Note that the file path is currently still empty, it will be filled in automatically whenever you press "render" or "render on farm":

The "render" and "render on farm" buttons do exactly what you expect them to do. After your render is finished you can press "create read from write" to create a read node for your render.
Rendering integrations by Gilles Vink.