Unreal Engine - Setting up Perforce
This is a beginners guide to working with perforce as a source control for Unreal engine. At the end of this guide you'll have setup your p4v and unreal.
Why perforce?
When you're working on a Unreal project, you often times work in teams. So, you want to work on the same files, at the same time. This can be a hassle. Especially since Unreal projects can't be opened on a external storage location such as a server. That is why source control was invented. There are several programs that can do this for you, but perforce is instigated nicely inside Unreal.
As a nice bonus, Perforce keeps track of file history. So if you ever make a oopsie and break the whole project, you can always revert back to a older version of it.
Setup p4v
First, make sure you have the perforce software installed. We are mostly going to use the p4v software. It stands for perforce visual.
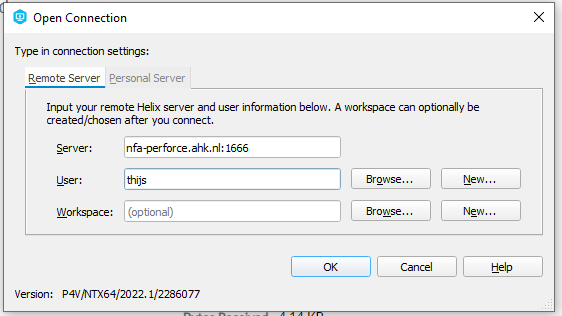
Open p4v. You will be prompted with a "open connection" window. For "server" fill in "nfa-perforce.ahk.nl:1666" and for username fill in your username. This will probably be firstname.lastname. Workspace can be left empty. Then click on OK.
Setup workspace
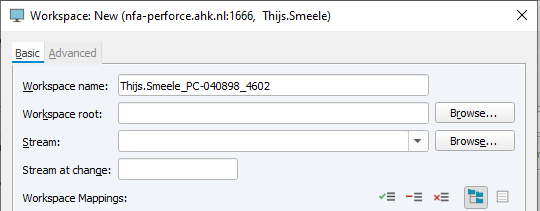
A workspace is the location on your computer where you work on files that are managed by the Helix server. To setup a workspace, click on No workspace on the left. If you already have a workspace, the name of that workspace will be here. Then click on New workspace. This will open a window to create a workspace.
First, give this workspace a good name. The suggested name will probably be fine. Then pick a Workspace root. This will be the folder on your PC where Perforce will write all its files to. It is advised for this to be a empty folder. Next up, pich a stream. A stream is a project on the Perforce servers. Depending on your permissions, you will see several streams when you click browse. Pick the stream that you need. When everything is set up, press OK.
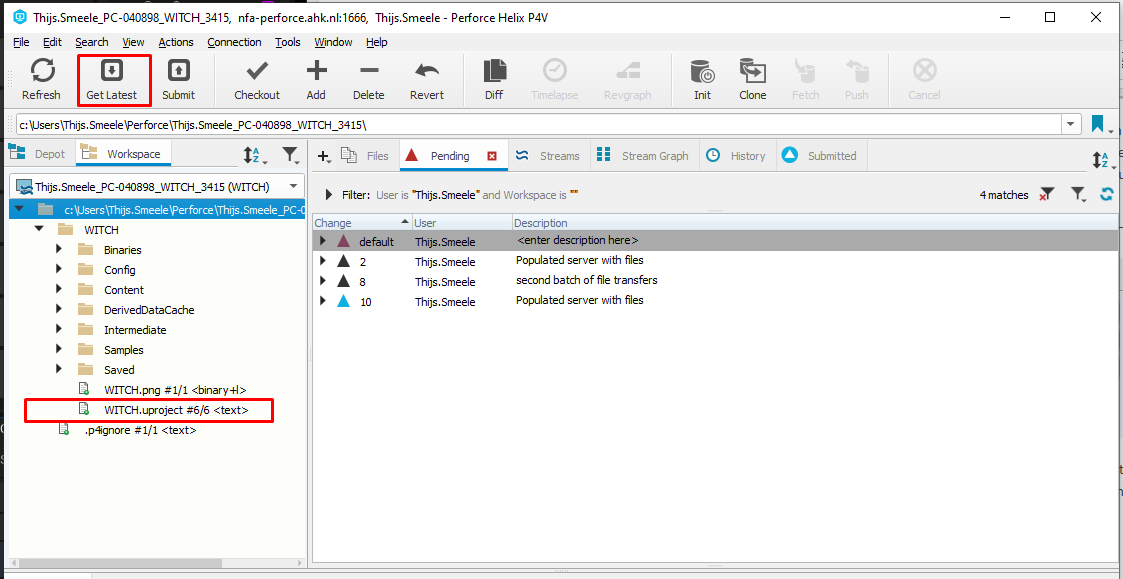
You now created a workspace. Select the master folder in your workspace and click on the "get Latest" button to start downloading all your project files. When this is done, you can doubleclick on your .uproject file to open unreal engine.
Setup Unreal
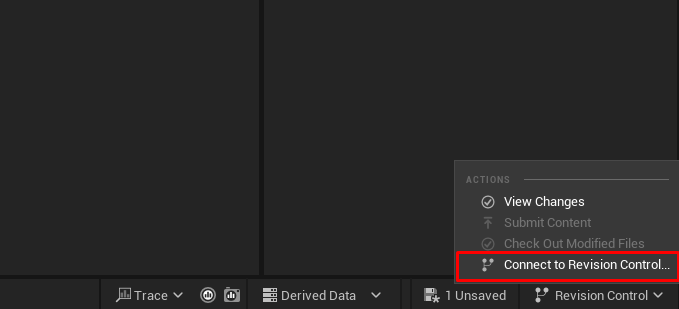
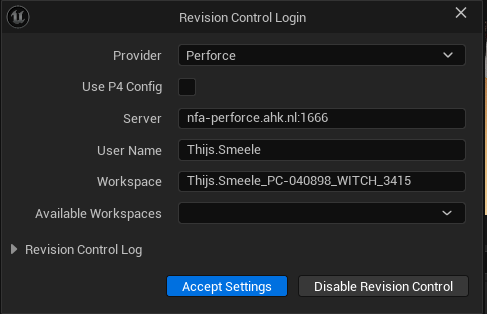
First, open up the unreal project that you have downloaded using p4v. On the bottom right, click on revision control. This will open the source control window. Inside the dropdown, select perforce as you source control. Now enter the same server as before. "nfa-perforce.ahk.nl:1666" and username. leave "Workspace" empty, this will be filled in automatically. Then use the "available workspaces" dropdown to select your workspace. Most of the time Unreal detects what workspace is opened, so you'll only see one available. Click on save and everything should be setup.
Working with Perforce
When working with perforce, there are two simple rules.
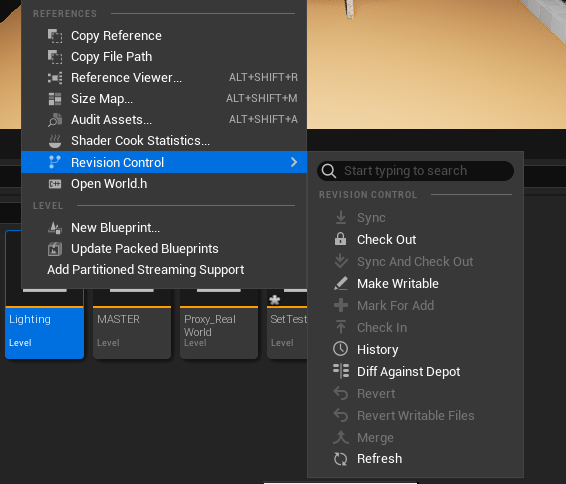
- When you work on a file. No One else should work on it. To ensure this, you have to lock the file for all other users on the perforce stream. We call this "checking out" a file. Most of the times, when you're saving a file, unreal will ask if you want to check out the files first.
- Don't work on files that other people have checked out. Most of the time you can't work on those files. But always double check before you start working on something. When you try to save it, the system will tell you that someone else already has it checked out. You won't be able to save it. It might ask you to make the file "writable". NEVER MAKE A FILE WRITABLE! You will not be able to merge the files with the server. And someone will have to throw away work.
- Make sure you get the latest versions and submit your changes. This is to make sure other people can work with your updates and you work with other people's latest updates. You can either do this within p4v using the get latest and submit buttons or you can do this inside unreal using the source control menu.


No Comments